Image Description
In this tutorial we are going to rip models,textures and animations from the original GTA Vice City game and then converting them to Coppercube compatible file format to clone or mimic the original game.
IMG tool to extract 3D models, textures, animations from .img file into .dff, .txd and .ifp format.
IMG TOOL (DOWNLOAD LINK)
TXD Workshop to extract textures into .png and .bmp format from a .txd file.
TXD WORKSHOP (DOWNLOAD LINK)
MED (Map Editor) to get the coordinates of the building and objects to place in our cloned game. and to get to know textures and models name for different buildings, and to get to know if collision is allowed or not, object is breakable or not etc.
MAP EDITOR (DOWNLOAD LINK)
Blender 3D editor to convert .dff into .fbx or .ms3d for animated models and .obj or another coppercube compatible format for static models and to apply textures to them.
Blender 3D (DOWLOAD LINK)
Z-modeler we will use this for few buildings and other models, which blender can't convert.
Z-MODELER 2.0.8 (DOWNLOAD LINK)
GTA tools addon for blender without this tool we can't do converting and applying animations in blender. This blender addon will make us enable to do all our stuff.
GTA TOOLS FOR BLENDER (DOWNLOAD LINK)
GTA .dff importer addon for Blender, to import .dff 3D models other than vehicles and characters.
GTA .DFF IMPORTER (DOWNLOAD LINK)
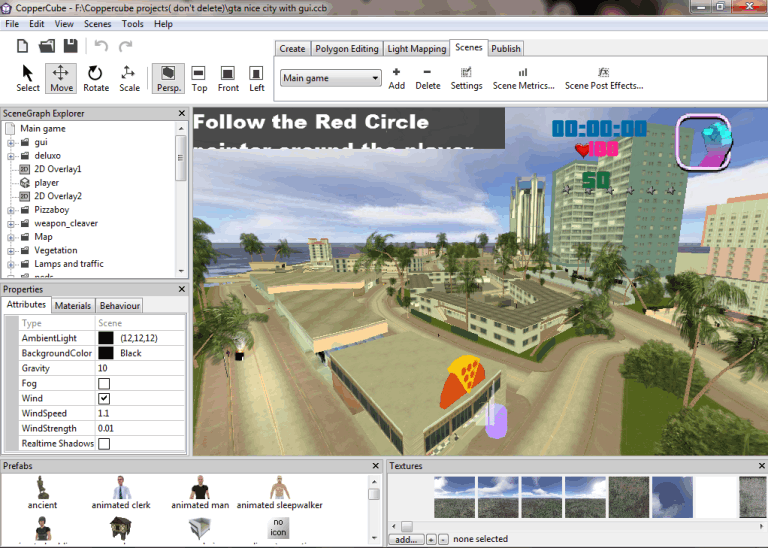
Coppercube 3D of course to do all our Cloning stuff.
COPPERCUBE 3D (DOWNLOAD LINK)
Image Description
Assuming that you have already downloaded and installed all the tools mentioned above, and you have the Original GTA Vice city game installed somewhere in your pc. So, lets start the tutorial by opening IMG tool. we will be going to extract Player, Ped and NPC's model only for now using this tool.
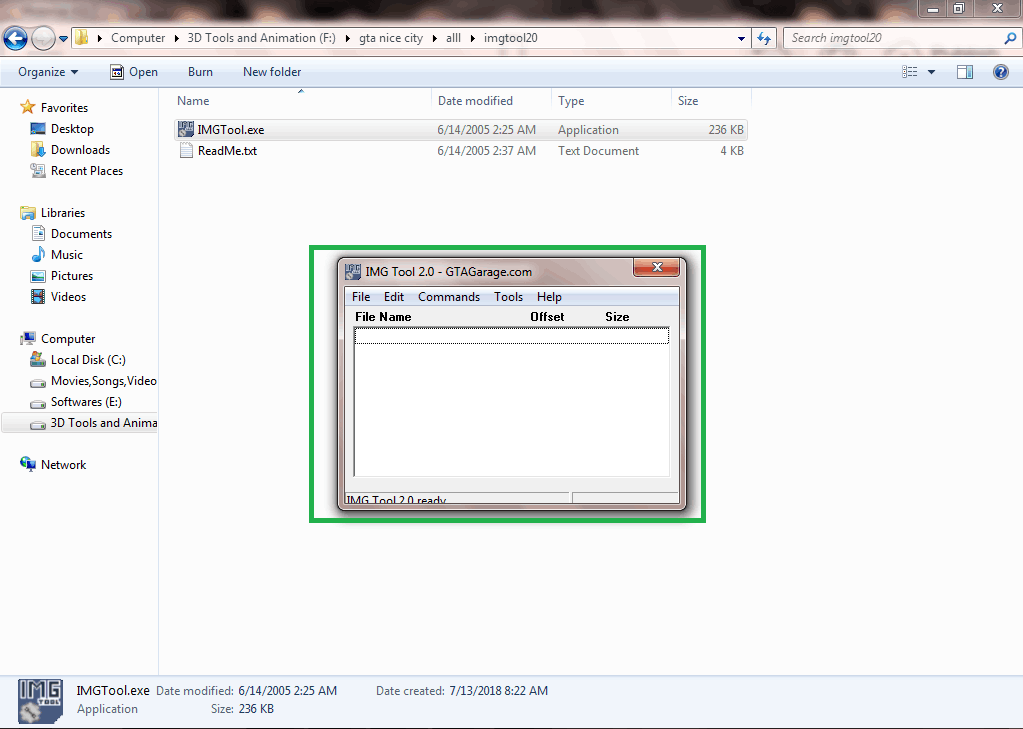
Image Description
First of all click on open img option and then locate gta3.img file in the models directory of your original game. Now it will load the contents of the img which are usually 3D models, textures and animations in .dff, .txd and in .ifp format.
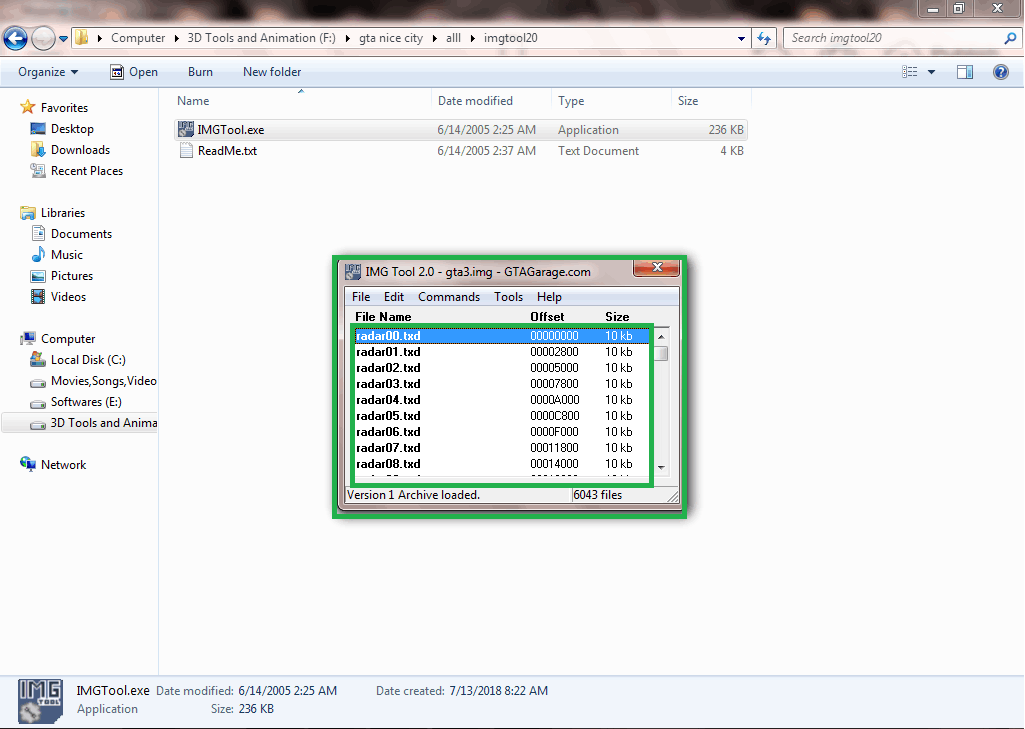
Image Description
Now you have to search for pedestrian models and textures in the whole img. it maybe difficult for you to get to know which model is which so here is a list of cutscene and in game characters which you can extract using imgtool. Remember you have to extract both .dff and .txd file for the peds.
List of Peds with names (Download Link)
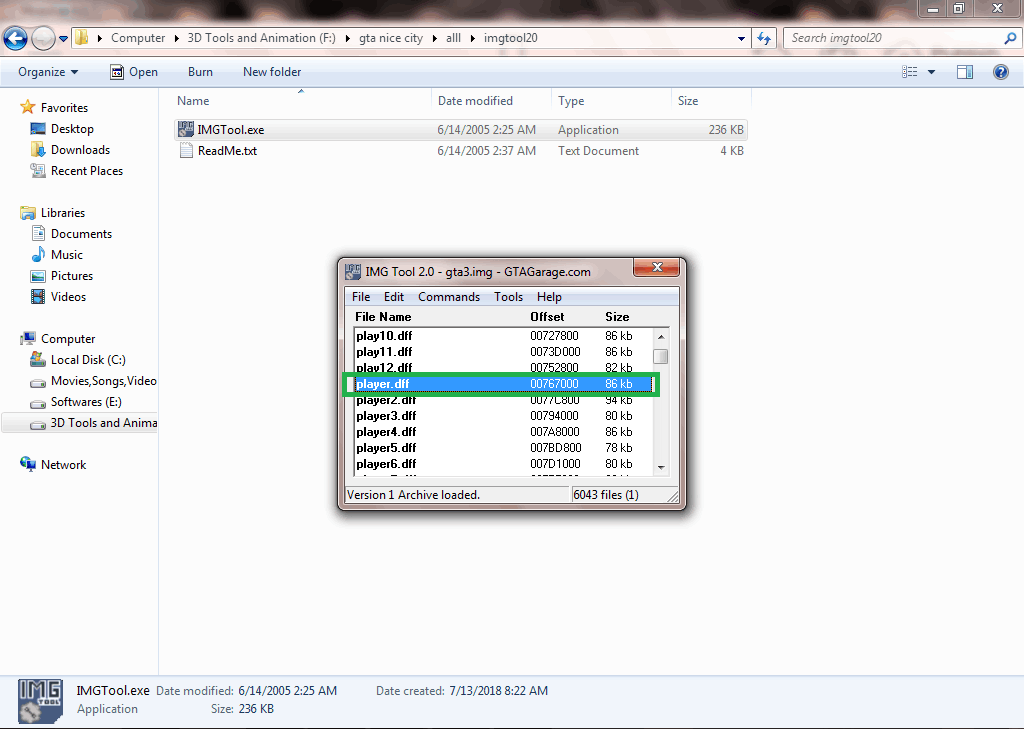
Image Description
Now we have our models and textures extracted but we have two problems they are not in Coppercube compatible format. So we have to convert them into other format. First we will be going to get the textures in .PNG format using TXD workshop tool.
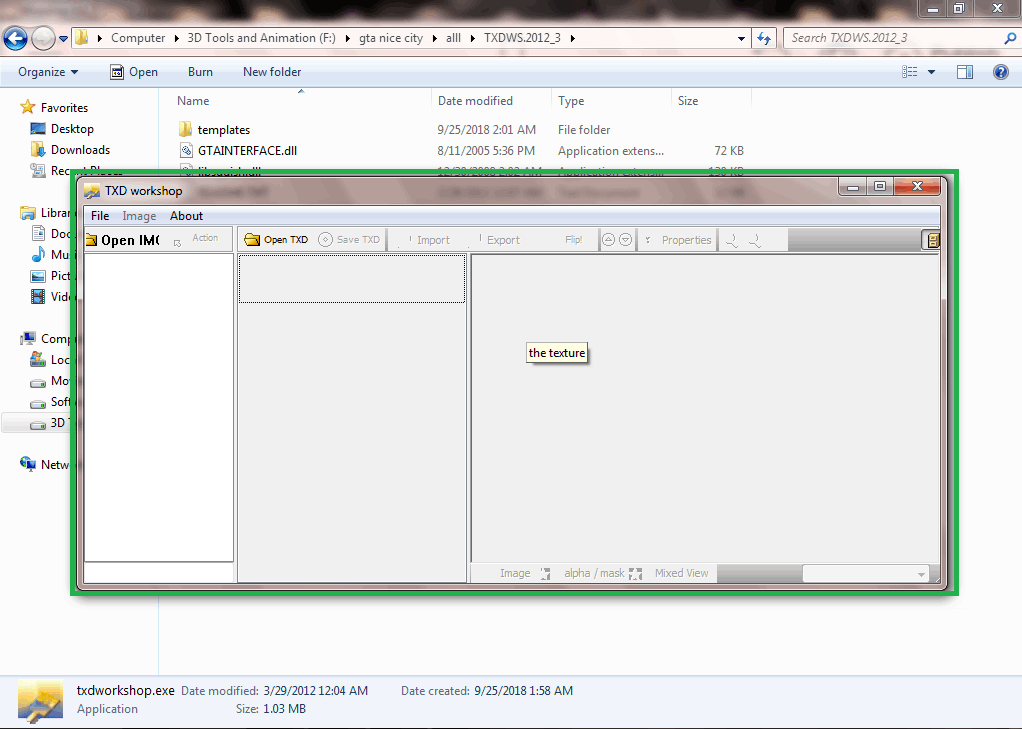
Image Description
Open the TXD workshop tool and click on open txd choose any txd file you want to extract textures for this example we will be using the "player.txd" once txd is open you will se the texture in the right panel of the tool. There is an option in the tool to export texture click on that and choose export all textures as png. before exporting note that you have to create a directory for each model and rename that directory to "modelname.dff_tex" here modelname is the name of model whose texture we are going to export.
for this particular example the directory for the player model will be "player.dff_tex".
Now choose that directory while exporting texture as png. There is a reason to do this because our blender addon will not read textures if they are not put into such directories.
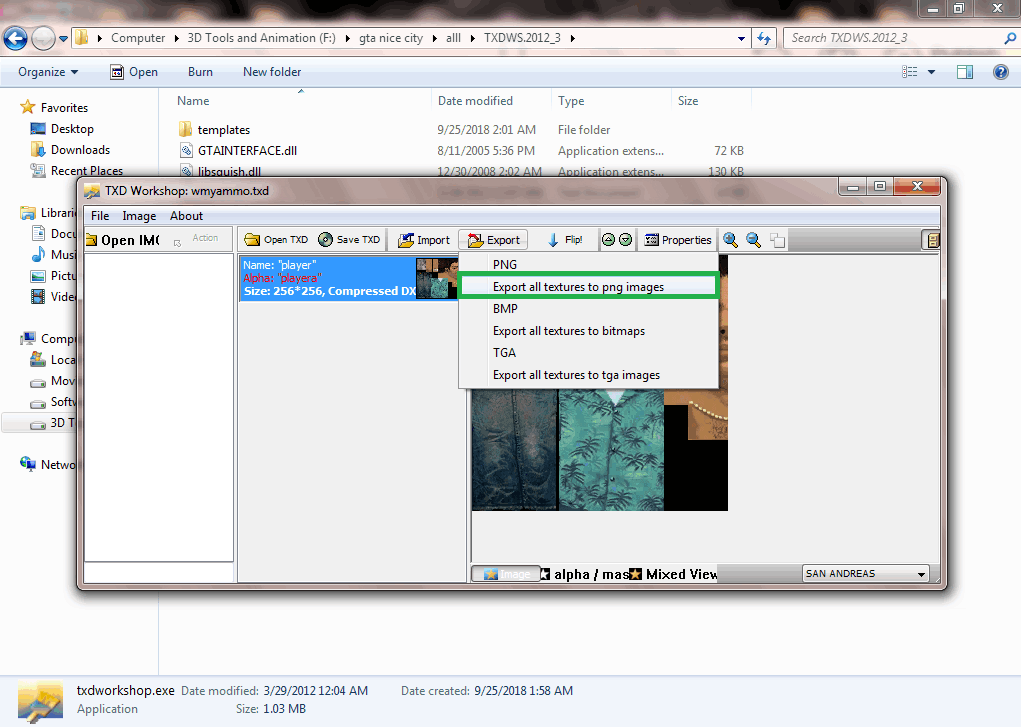
Image Description
First of all you need to install the blender addon to your pc. assuming that you know how to install blender addons am skipping this step. If you don't know how to install a blender addon then you may refer to the readme file provided with the Addon tool.
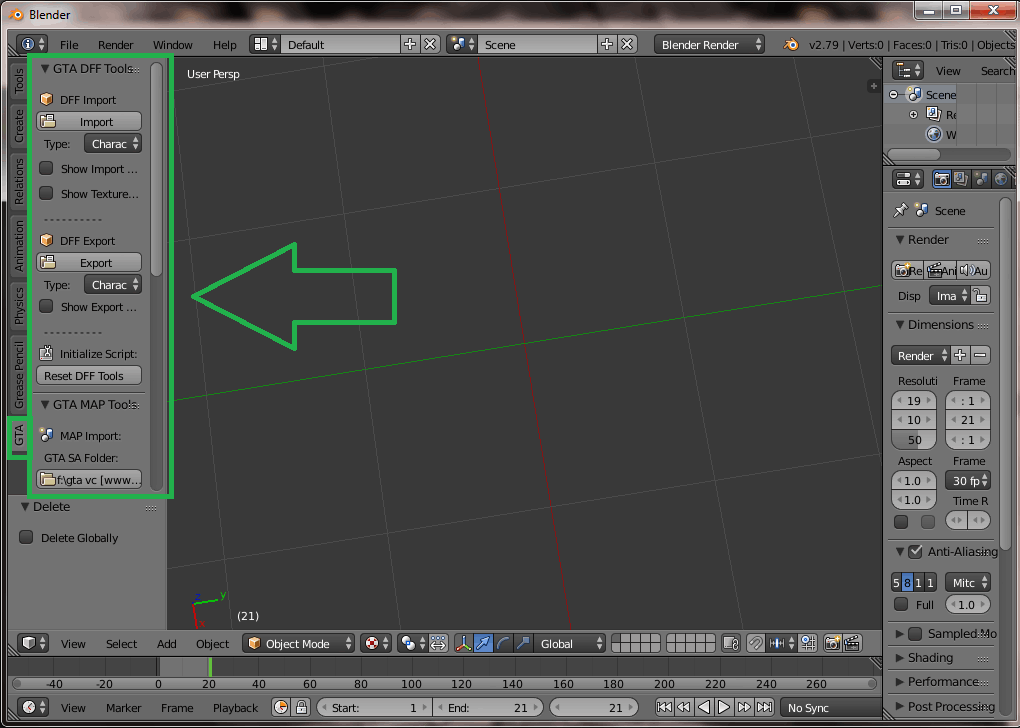
Image Description
Once the GTA tools addon is installed and enabled. you will now see a new tool named as GTA in toolbar of blender, if toolbar is hidden you can press "T" to show and hide it. Click on GTA and you will be provided with options to import, export dff, map and extracting of txd textures. we are not going to use map and txd option we will only use the dff import option. As we are going to use a character model we will leave the model type to character and will click on import.
NOTE:- To import models other than characters and vehicles please use the other addon provided GTA .dff importer, for example to import building and other objects.
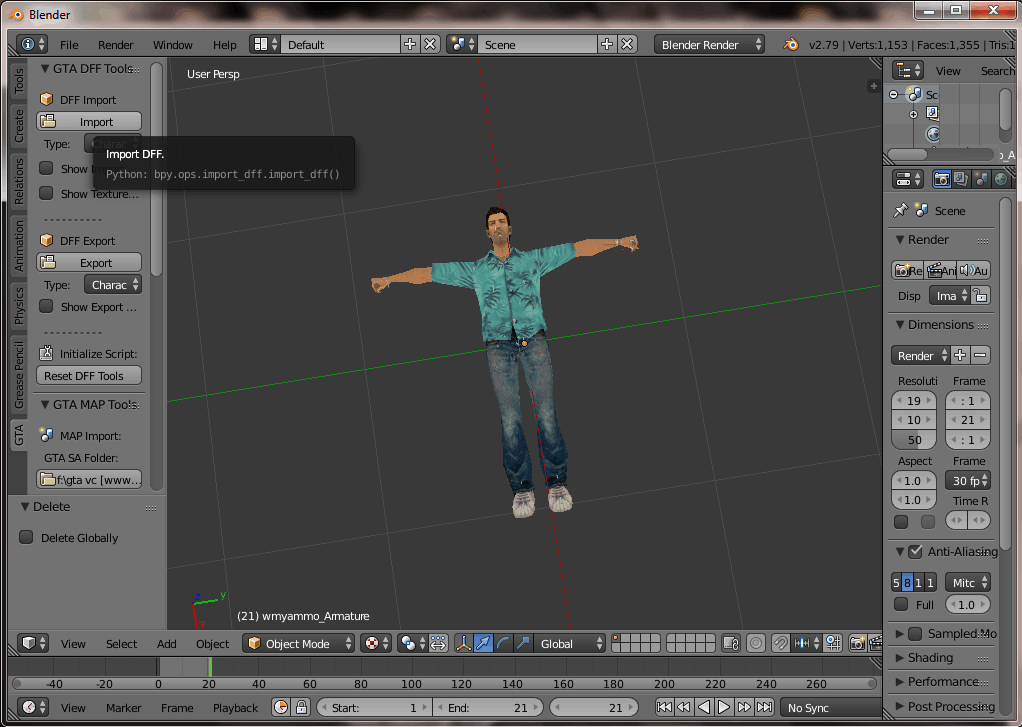
Image Description
Now we will select our "player.dff" file and import it. Remember always delete the default cube from blender before importing any model. Once the model is imported it will be shown in T-Pose in blender, note that the model will also have an armature.
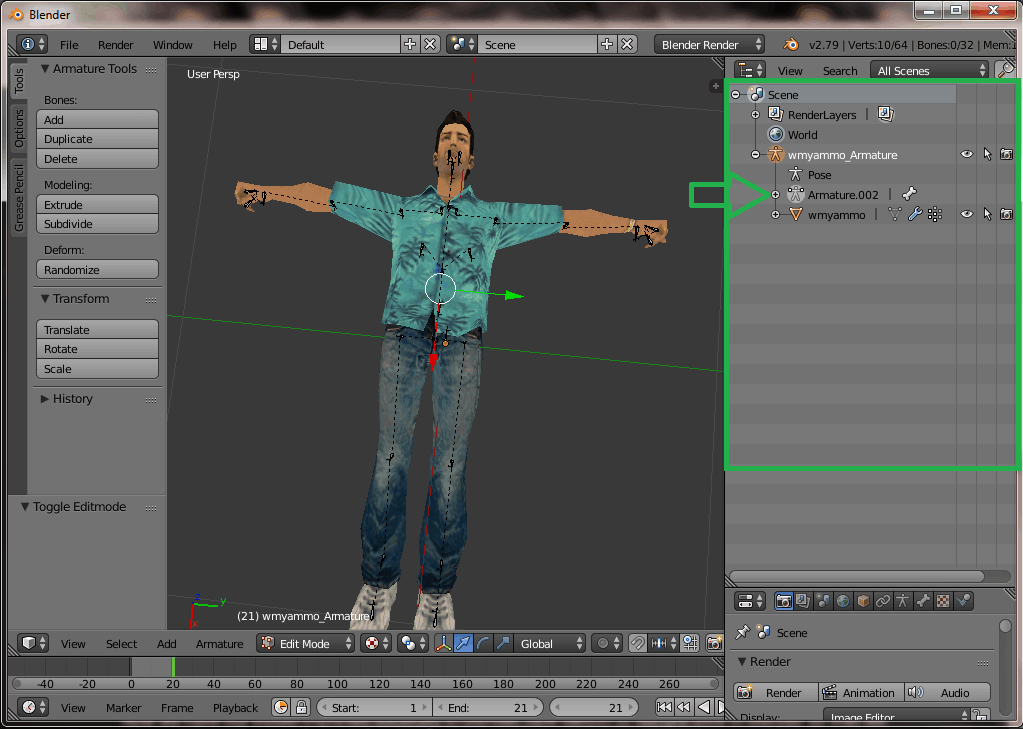
Image Description
Now we have our model imported successfully in blender, now switch to texture view in blender so that we can see the character with textures. Next we will select the armature of the model and will switch to pose mode. As soon as we switch to pose mode we will notice that the options in the GTA tools have been changed from dff tool to ifp tool, .ifp is the format used by Rockstar Games to store the animations.
Staying in the pose mode click on select ifp file in the ifp import option of GTA tools. Now locate the GTA VC "Anims" directory and select "ped.ifp". Once the file is imported you will see a huge list of animation in the GTA tool ifp import panel. You can click on any animation you want like "Arrest Gun" ,"ATM" and click on load. You will now notice that the animation has been applied to that character. You can now play animation by hitting "ALT+A".

Image Description
Now we have our model with the desired animation, now we would like to export it to use it within coppercube. You can either export the model in .FBX or .MS3D format. Supposing that you know how to create actions for animations in blender am skipping this step. It will help you to add animations as different set of actions and if you load the file in CopperCube you won't have to edit animations they will be shown as actions. For example if you want run as different action and shoot as different action you can do this in blender and coppercube will respect that and will show them as two different animation set.
If you don't know how to create actions and then you can see tutorials regarding this on YouTube.
Still if you don't find the correct tutorial then please let me know in the comments section.
To Export the model go to file export .fbx , I prefer to use .fbx but you can also use .ms3d.
You don't have to mess with any export settings just simply export the model. it may take sometime depending on how many animations you have added to your model. Blender may also show not responding but ignore that warning and you will be done with exporting.
We are going to use this tool for placing the buildings and maps correctly and will use to understand the nature of objects and materials. Open the tool set the directory of your vice city game and it will start loading the file it may take some time or may crash for the first time. If it crashes re run it.
once it is loaded you will see four option in left panel of the tool named as "IDE", "IPL", "SCENE" and "ITEM".
We are not going to use IDE and IPL we will use SCENE and ITEM only.
Before loading Map i will suggest you to start coppercube and do the work side by side with Map editor because this part will take months if you wish to clone the whole games because there are hundreds of objects in the map, and you have to convert each object into .obj or another coppercube compatible model using the technique showed in the above part of blender. So, open coppercube with a new scene switch to map editor tool, decide which area of the map you want to clone first downtown, starisland, norther beach or any other for example we are going to use the nbeach (northern beach). To do that select the scene option in the map editor, you will see a lot of areas with checkbox. Tick mark the checkbox next to "Data/MAPS/nbeach/nbeach.ipl" and click on the render button.
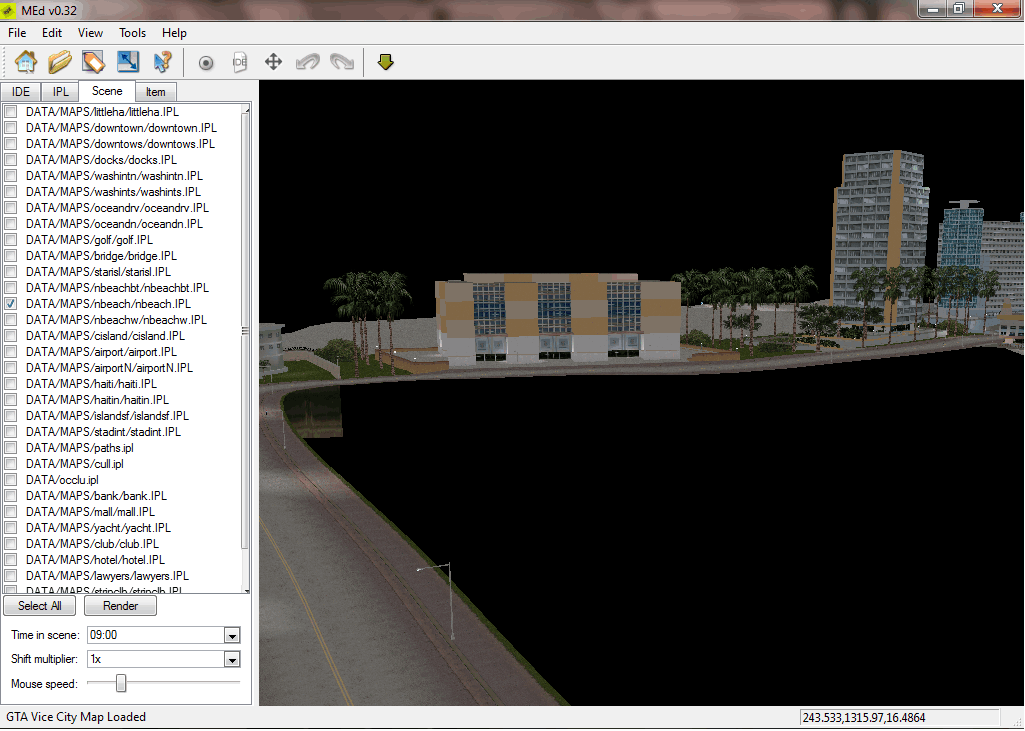
Image Description
Once you rendered the scene you will see the map of that area in the right panel. Double click on any object in the map. you will notice that the left panel has automatically switched to "ITEM" menu. and you will se some information regarding the selected object like .dff file name and its position on the X, Y, and Z axis which are in reality coordinates we are going to use. if you want more info for example if you wanted to know the name of texture file .txd and information about materials and all, you can right click on the object and choose properties. It will show you the model name as well as the texture used and other material info like if the model has alpha transparency or wet effects or if the object is interior of a building or a breakable item and all other stuff. Now you know the .dff file name and .txd file name now all you need is convert and export that object using the above method we used to export the animated player model. Note:- Coordinates Z axis and Y axis are opposite in coppercube, so if it says like "230" in Z axis of map editor then it should be "230" of Y axis in coppercube same goes for Y axis of Map editor if it say like "110" in Y axis of Map editor then it should be "110" on the Z axis of Coppercube.
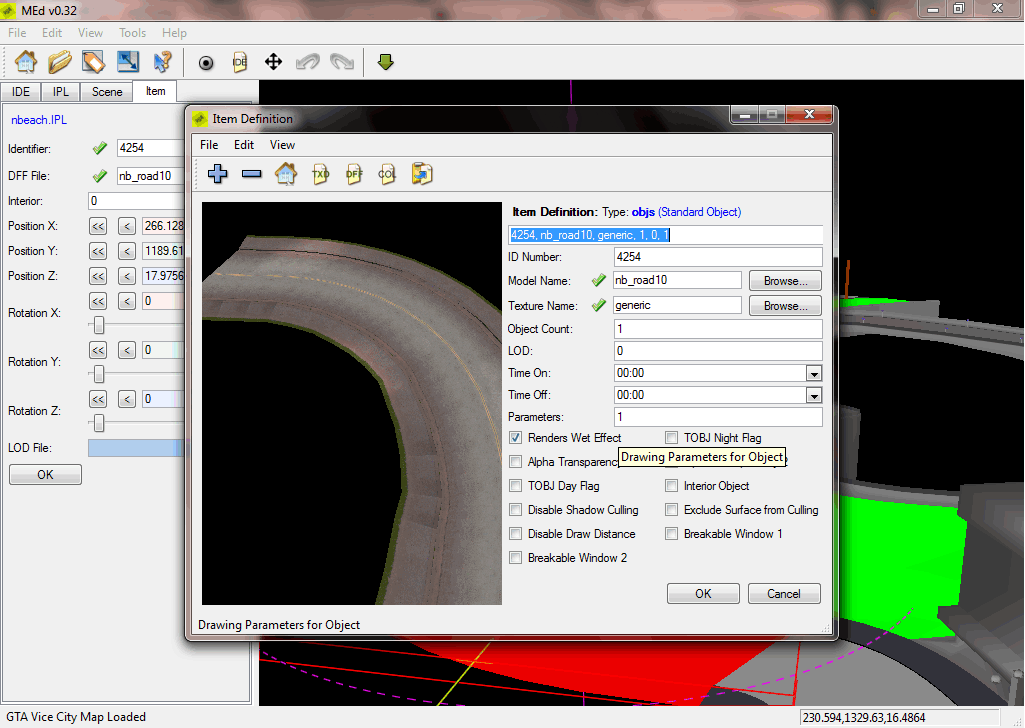
Image Description
Now that we have our model exported and we know coordinates of the objects, we will now import and place them according to coordinates in coppercube. Open a new scene in coppercube use the import static mesh button to import the building, road or any other map item. switch to map editor check the coordinates of that item and fill them in X,Y,Z position in coppercube do this for all other objects and you will notice that the placement of the object is exactly the same as if was in the original game. Once the whole map is imported import the animated meshes and do the logics and create the game.
Note:- Always save your progress and creates as many backups as possible.
So we have used all of our tools and learnt how to use them to extract, convert and use the original GTA Models and animations in coppercube. Many of you guys are requesting me to write this tutorial so here it goes. Be aware of the Copyright issue. This tutorial is for educational purpose only. If you wanted to download the CCB Template of small clone of this then you can download it from here GTA VC CLONE WITH GUI.
You might be wondering why I didn't wrote a single thing regarding the Z-modeler, so here it is, Z-modeler will only be used if blender fails to import a .dff model , then only you have to use the Z-modeler, if you can do stuff with blender then am pretty sure you can handle this tool too all by yourself.
If you guys still face some issues then please let me know.
Tip:-while converting and exporting map items, create a single folder for the textures, because most of the roads, trees buildings and other object use the same textures and CopperCube will not distinguish between them and will duplicate them which will make the file size a best and slow the editor saving and loading process. So, to prevent yourself from this you should put all your textures for map item in a single directory. All the Best!
Neophyte is a website developed to provide tutorials, assets and source files of CopperCube projects.
© Copyright 2018-2021 Neophyte - All Rights Reserved