Creating a screensaver for windows using coppercube 3D

In this tutorial we will be going to create a screensaver for windows using coppercube 3D with parallax background.

Step 1

Getting the resources

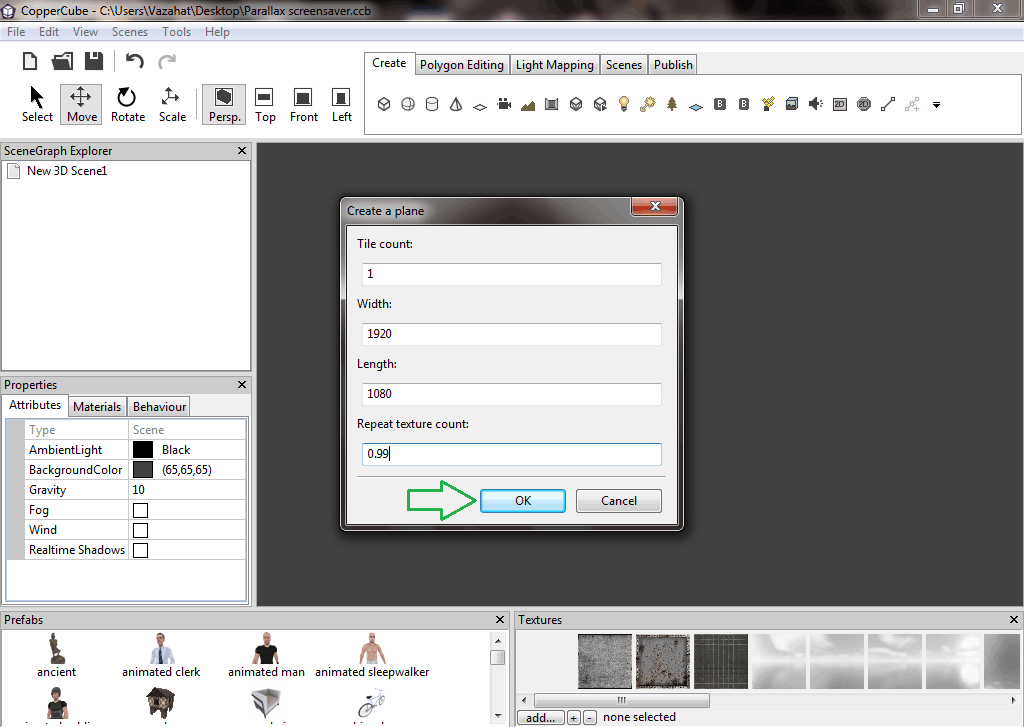
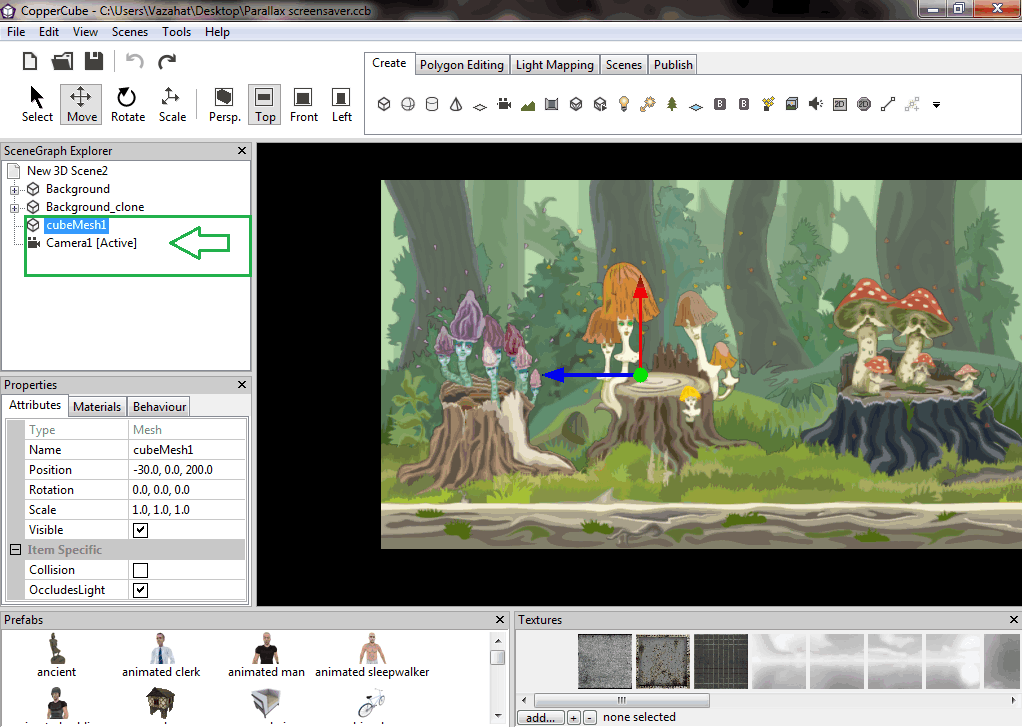
As always our first step is getting the required resources. For this tutorial we are going to use planemeshes with textures on them. So the only resources we need right now are textures.
Am going to use FairyTale parallax backgrounds textures, which i got from itch.io you can use any texture you want.

Step 1

Step 2

Creating planemeshes

First of all check the resolution of the textures, Fairy-Tale texures all comes in 1920x1080 Resolution.
Now we will switch the view to top mode, so it will be easier for us to align the planemesh. Create a new planemesh with 1920 width and 1080 height and with repeat texture count of (0.99), so that it will not show any extra outcome from the textures.

Step 3


Now we will apply our first texture to it which is also going to be the first layer of our parallax background. Now we will change its material to transparent alpha from solid.
Clone this planemesh as many times as your background layers.
we will clone it 6 time to make a total of 7 layers as for current parallax background.
Change textures of each planemesh according to the bacground layers.

Step 4

Step 3

Aligning planemeshes

Now,we will make all the planemeshes children to our first planemesh.
Change the rotation of Y-axis of the first planemesh to "90", now change the position of all the planemeshes Y-axis by "10".
for example "10" for planemesh2, "20" for planemesh3, "30" for planemsh3 and so on.
Till now we have successfully created a parallax background.  

Step 6

Step 4

Cloning the whole background

Now we will clone the whole parallax background we have just created in step 3, and we will set our snap to grid size to width of our planemesh, which is "1920" in my case. now we will move the new background a little bit to negative of Z-axis and then press Ctrll+M to snap it.
We needed to do this because we are going to make it endless.

Step 7

Step 5

Creating a cubemsh to use as camera target

Now create a cubemesh,set its material to transparent add and choose a black texture for it, set its position to (-30,0,200) this value can be diffrent depending on your scene and textures, actually you to align the cubemesh so that when you preview the scene by testing as exe the screen will cover the background fully.
Now create a third person camera and choose the cubemesh as a scenenode to follow.
Change the position of the camera to same as of cubemesh  (-30,0,200).

Step 5

Step 6

Cloning cubemesh 2 times

Now clone the cubemesh, rename the clonemesh to "Proximty point1" or whatever you like and make it children of the first background, now clone another cubemesh, rename to "proximity point2"  and make it children of second bakground and adjust it position (if it is not same as the first proximity point) position might be diffrent but the Position values must be same.

Step 6

Step 7

Moving the Cubemesh

To make our camera moves we have ot move our Cubemesh, so lets add a behavior every few seconds do something  set interval MS to "100", attach action change position of a scenenode , change set position type to move by vector, change which scenenode to "Cubemesh", Vector will be (0,0,-10), move animated = yes, time to move "100" Ms.

Step 7

Step 8

Adding behaviors to Proximity Points

We'll be going to add proximity behaviors to each of our proximity points, we created in step 6.
for the first proximity point we are going to use a distance of "30" with proximity type as sphere, Choose "Cubemesh" as near to which scenenode and leave the other options as it is, attach a Change position of a scenenode action.
Change set position type to relative to a scenenode, change which scenenode to "background2", Position will be (0,0,-1920) in my case, relative to which scenenode = "background1" 

add same proximity behavior to proximity point2 all you have to do is swap the scenenode in the action of change which scenenode and relative to which scenenode.
Now test the exe , the parallax background is working and is endless but now we need to convert this into screensaver which on mousemovement will close.

Step 11

Step 9

Checking mouse movement and converting into Screensaver

We want that our screensaver will close if mouse is moved to that we are going to add 2 little piece of java-script code to our scene.
Select the root scene node and add a behavior Before first drawing do something now add execute javascript action.

Add this code as the script:-
var mouseX = ccbGetMousePosX();
var mouseY = ccbGetMousePosY();

ccbSetCopperCubeVariable("mouseX", mouseX);
ccbSetCopperCubeVariable("mouseY", mouseY); 


Now add another behavior Every few seconds do someting set IntervalMs to 1 and then attach execute javascript action.

Add this code as the script:-
var mX = ccbGetCopperCubeVariable("mouseX");
var mY = ccbGetCopperCubeVariable("mouseY");

var mouseX = ccbGetMousePosX();
var mouseY = ccbGetMousePosY();

if (mX != mouseX)
ccbEndProgram() ;

if(mY != mouseY)
ccbEndProgram();


Now if you test the exe you will notice that the app will close if mouse is moved.
To Convert this app into screensaver just replace the extension of the published windows file from ".exe" to ".scr"


Step 10

Conclusion

Hurrrah!! We just have sucessfully created a screensaver with endless parallax background for windows platform. You can further add or enhance this by adding sounds and other elements.

TroubleShooting

 If you have any issue and problems regarding this tutorial, just ask me it in the Comments section.

About

Neophyte is a website developed to provide tutorials, assets and source files of CopperCube projects.

Join Us