Creating a 2D game "Mario" in Coppercube

Most of the Coppercube game developers and newbies find it difficult to create 2D games using this 3D
engine. In this tutorial we are going to create a clone of the classic Mario game level without programming a single line of code.

Step 1

Getting the resources

The most important and difficult part of any game development is getting the desired  resources for the game idea, you will need textures, sprites, sounds, background music and lot more. That's why I choose MARIO as base for this tutorial. You can get the resources easily on the internet. Just google Mario game resources and you will be provided with bunch of resources. To get started faster I have listed my favorite site for getting the game resources, You can also download the resources directly by going to the google drive link provided below.

Step 2

step 2

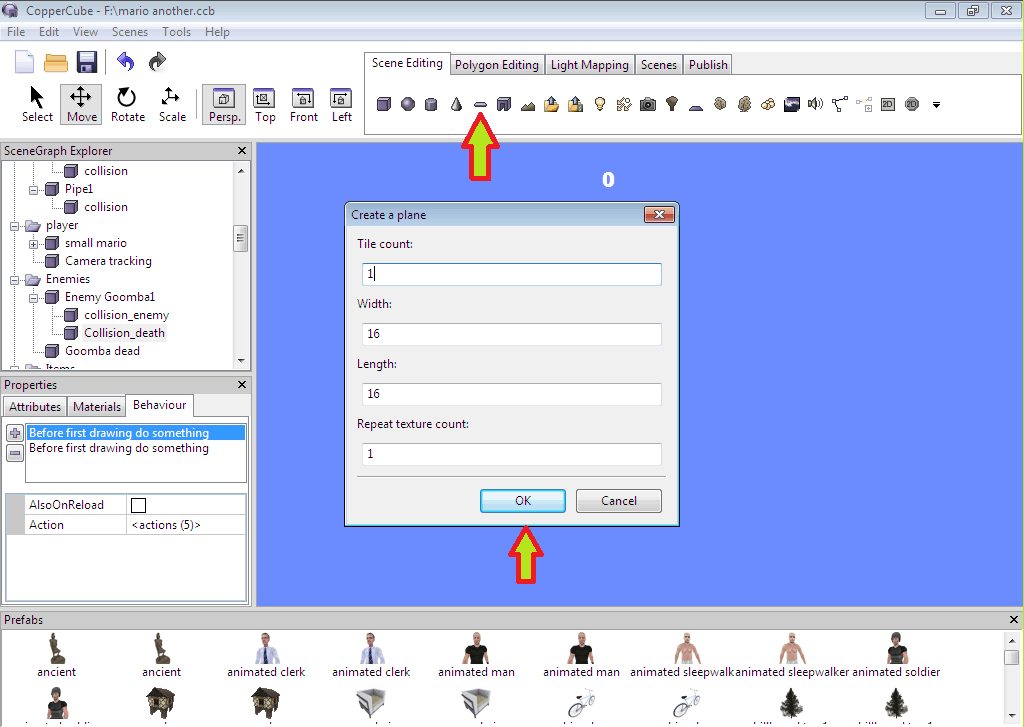
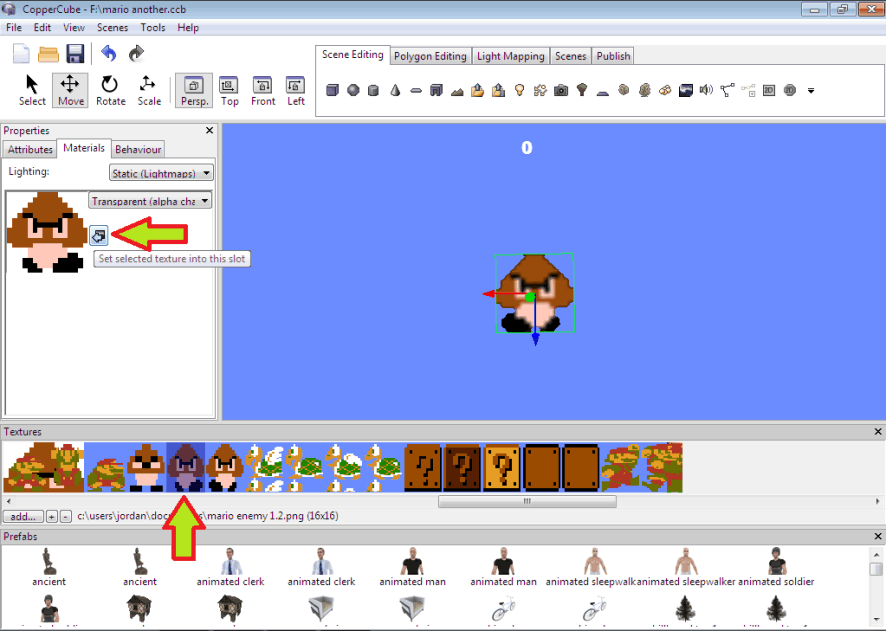
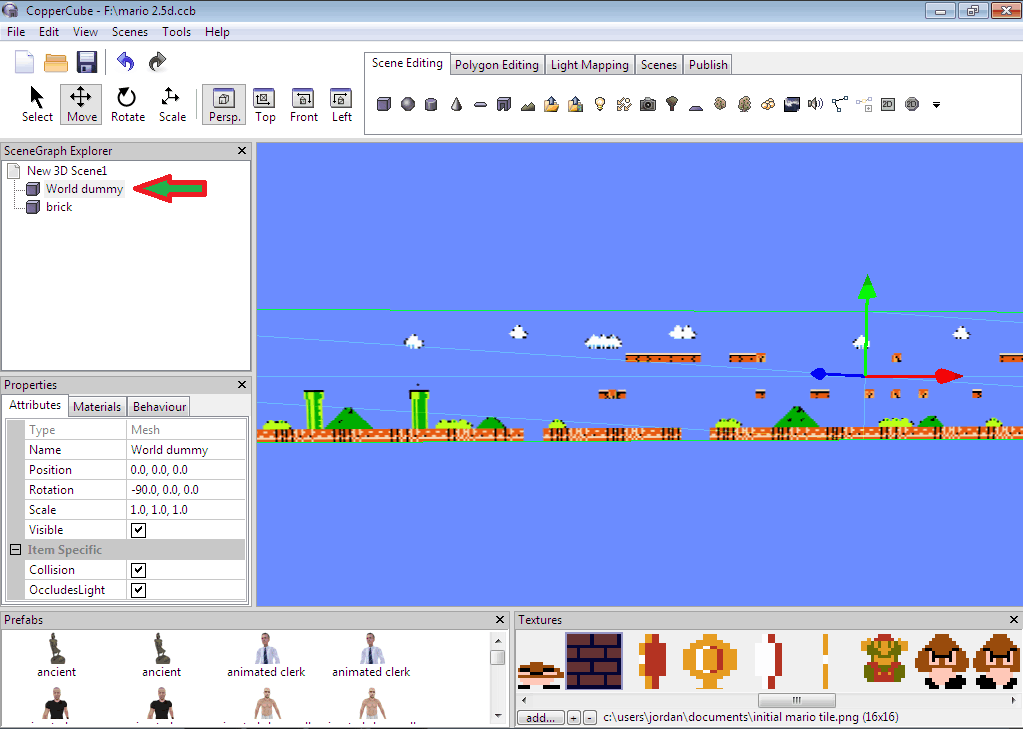
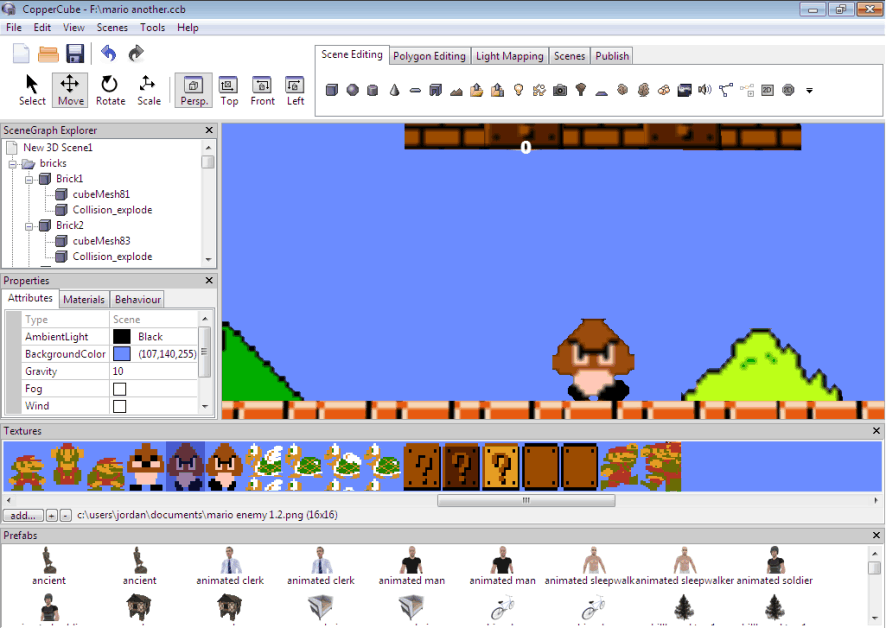
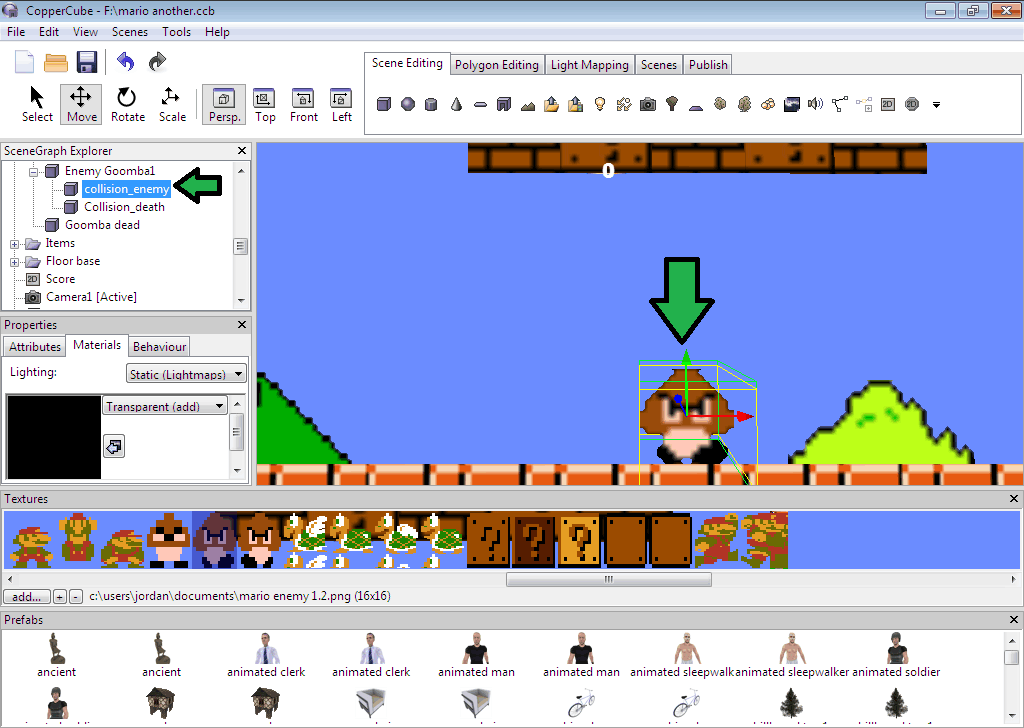
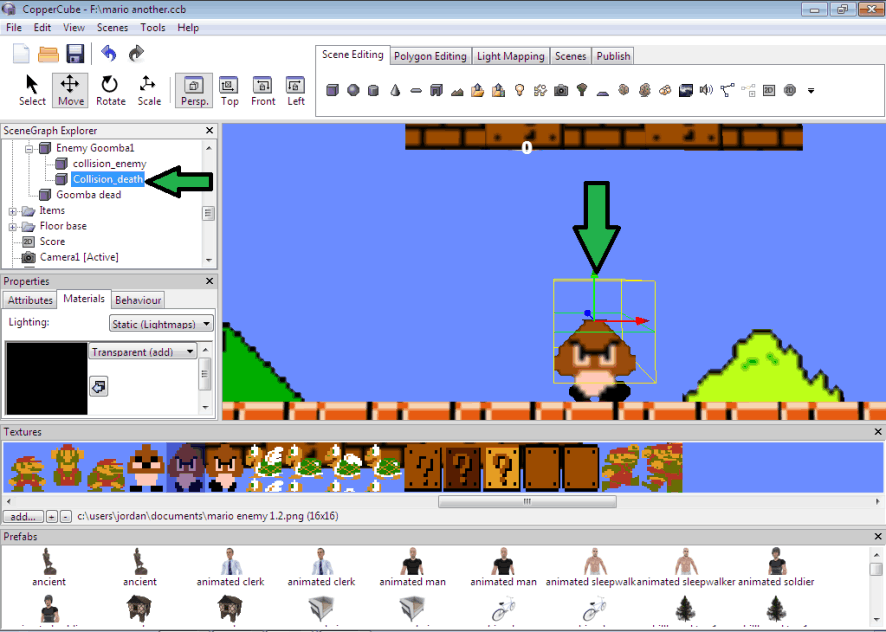
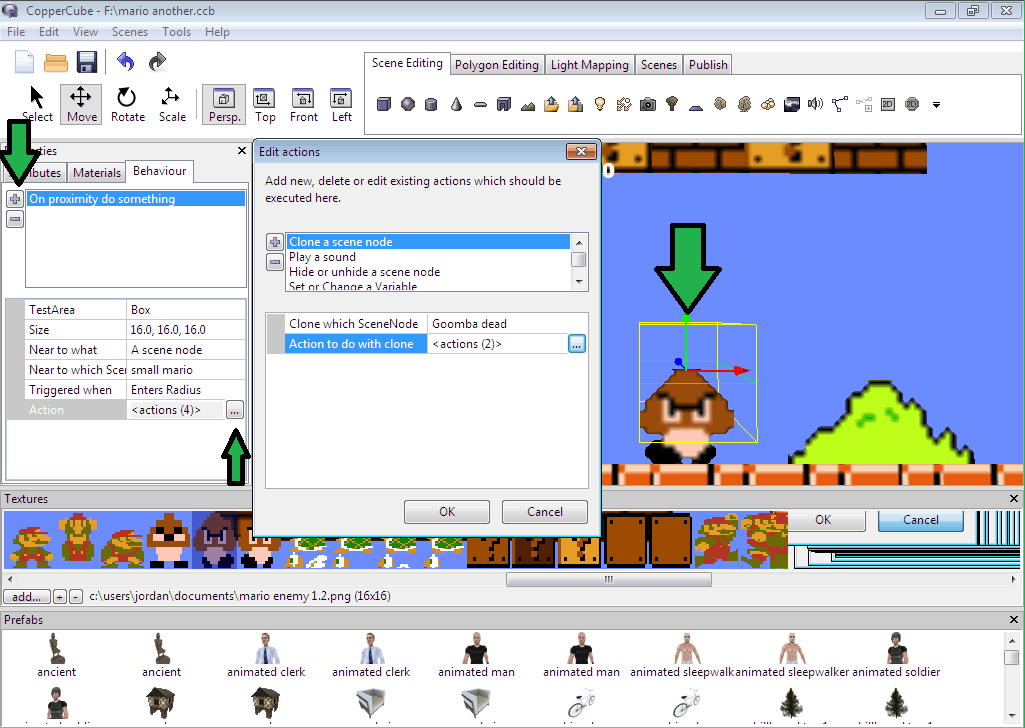
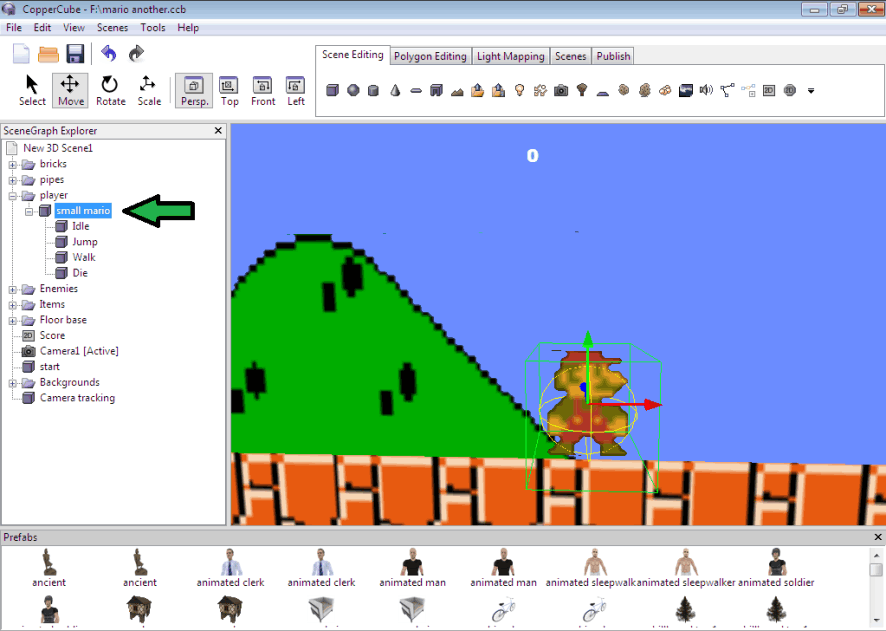
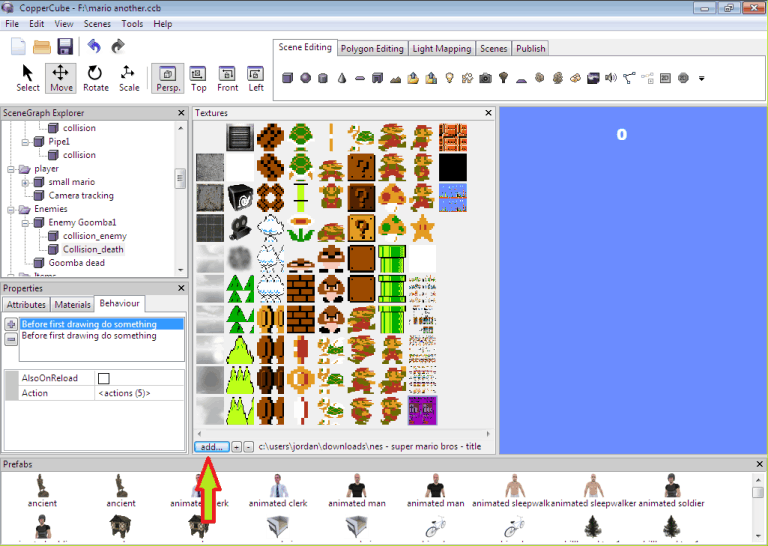
Importing The Resources Into The Engine

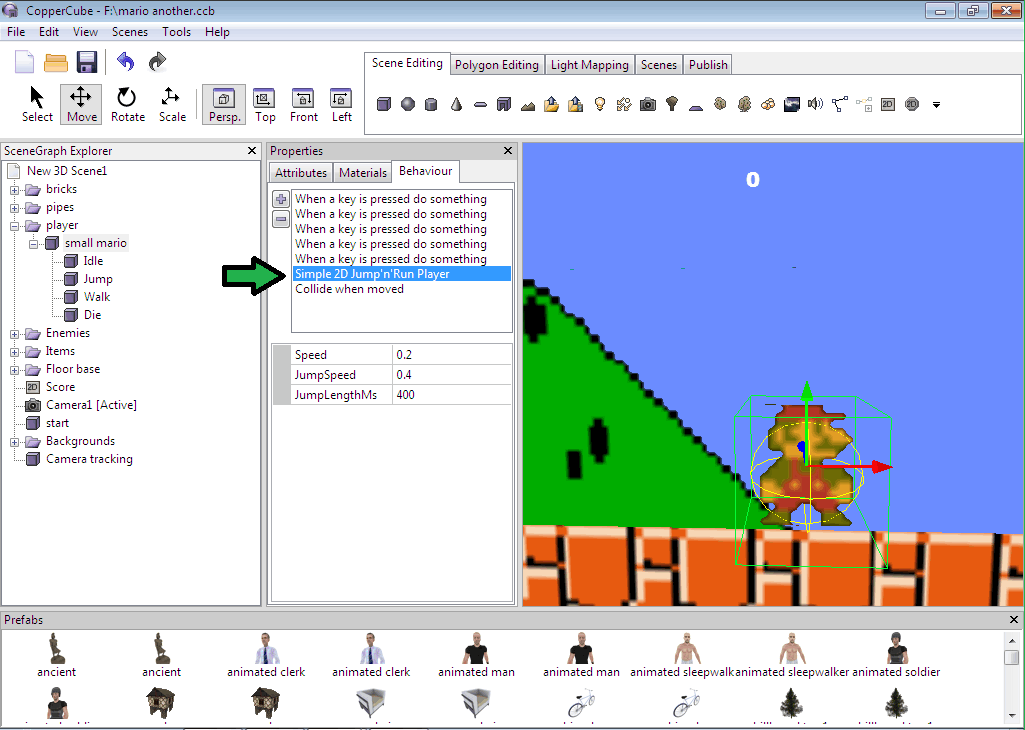
While working with a 3D game, I spend a lot of time deciding what I want to import first NPC'S, main character or backgrounds etc. But as we are working on 2D game, what we need is to import all the textures or .png resources. we don't require to import anything else.

Step 3

step 3.1

Applying textures and creating 2D assets

We have our textures imported now we have to convert them into real asset to use in our 2D game.
First of all we need to know the resolution of the texture of the item we are going to add in our 2D game. The enemy Goomba for example has a resolution of 16X16. 

step 3.2

So what we gonna do is we create a planemesh of height 16 and with a width of 16 as well and then we have to apply the texture for enemy Goomba to the planemesh. Rename the planemesh to Goomba.
Do the same thing for other characters or backgrounds. Select the texture, get the resolution and create planemesh according to that resolution, apply the texture and rename it.

Do not create more than one instance of an object, for example there are total of 16 Goomba's in Mario world 1-1 but we need to create only one Goomba.

Step 4

Placing The Objects

Once we are done with converting textures into meshes. We are going to place the background objects to their position. we are not going to place game objects which affects the gameplay. we are going to place static object like clouds, floor, plants and stone walls, which have nothing to do with the gameplay.

Step 4

Step 5

step 5

Scaling and Rotating

To place the objects into the right positions we are going to create fake (Dummy) asset. To create a dummy of the level all you have to do is to create a planemesh of the same resolution of the provided texture for dummy. and position it to (0,0,0) now select the object you want to place into the game. For example select the cloud and drag it to the same position as you see on the dummy world. Do the same thing with other background objects like plants, bushes, and stones. 

Step 6

step 6

Animating Game Objects

We have placed the background objects, we are ready with our enemies, character, bricks and item meshes, now we need to animate our meshes. To animate our meshes we are going to use an inbuilt Coppercube behavior ANIMATE A TEXTURE. Select the enemy Goomba mesh and click on add behavior choose effect behavior and select animate a texture. Now select both of the enemy texture Goomba walk1 and Goomba_walk2 for the texture in the behavior setting. you will instantly see your enemy animation. Do the same for other objects, except the player object as he is going to have multiple animations.

Step 7

step 7.1

Adding Collision And Behaviors

We have our assets ready with textures and animations now all we need is assigning collision and behaviors to them. Let's create a cube mesh of size 16 (size is according to the resolution), copy the position of the enemy Goomba and paste that position to cubemesh and make the cubemesh child node of that Goomba. Change the material of cubemesh to transparent add and assign a black texture to it. Rename the cubemesh to collision_enemy.

step 6.2

Now add a planemesh of 16X16 and adjust its position to match the position of Goomba. Assign the same material settings as cubemesh to it and rename it to collision_death. Position the planemesh such that it will be on top of the cubemesh. and make it child node of the Goomba.

step 7.3

Now add a new behavior to the Collision_death "On Proximity Do Something".
Test Area = Box
Size = 16,16,16
Near to what = a scenenode
Near to Which scenenode = Player
and in action to do add a clone action of the death of Goomba node relative to the original Goomba.
add play sound action and play the kick sound.
add a change variable action and add 100 value to that variable (create any variable you like ,e.g. Score)
add scripted action do something later.
and choose 100ms and in action to execute add delete scenenode action and select Goomba as a scenenode. 

Step 8

step 8

Player Mesh

Now we are ready with behaviors of our NPC's. Its time to have our player in the game. First of all create a cubemesh of size same as the resolution of player. e.g. small mario has resolution of 16x16. now we will create a cube mesh of 16 size and rename it to "Player". and will assign a transparent add material with black texture to it. Now create four different meshes for our player as we have done in step 3.
each of the mesh will have different animation. one will have run animation, second will have jump, third will have idle and fourth will be going to be a death animation. Make all the four meshes children of the player cubemesh.

Step 9

step 9

Adding Behaviours To Player

We will add a collide when moved behavior to our mesh and adjust the sphere according to the player mesh.
And we will add simple 2D jump and run behavior to make the character move and we will add different key pressed behaviors to switch between animations of the player. e.g. if a key pressed "SPACE" then hide all the other children nodes and show only jump node of the playermesh. I have also edited the behavior jump and run so that the player won't move if up and down arrow keys are pressed.

Step 10

step 10

Cloning and Placing Objects

Earlier we have placed backgrounds objects like clouds and plants now we are going to place our enemies, bricks and item blocks. we will do same as we have done before we will use the dummy mesh to position objects. but we will need to clone objects first so clone all the instances of an object you want in your game e.g. clone enemy Goomba 16 times. and place them according to the dummy. Using the same way place all other objects. Also adjust their behaviors.

Step 11

step 11

Ai and Movement of Enemies

For the movement of the enemies we will be going to use change position of a scnenode action which will be relative to a scenenode. Most of the time we will make them relative to the pipes. We need to add the action to the behavior before first drawing do something.

Step 12

step 12

Adding Camera


Add a 3rd person camera to your scene and choose player as object to follow. change the target height if you wanted to and assign follow from behind fixed rotation. You can also add a clonemesh of player without collision and jump set to zero then set it as target for camera to do correct camera tracking.

Conclusion

Hurrah!! we just completed cloning the Mario game. In this tutorial I have skipped a lot of details. but i have tried to cover all the major parts, and have also provided the link to a ccb file which may clear more doubts.
CCB file doesn't contain the complete level. it covers all the major part. e.g. killing enemy, picking up coins, etc.

Links

CCB Template and Resources

Here is the URL to download CCB template of this tutorial and resources used in this clone.
Resources
CCB Template


Share this Page!

About

Neophyte is a website developed to provide tutorials, assets and source files of CopperCube projects.

Join Us